
Hachiman Zawa is the first prominent stream the Kimpu San Highway crosses on its way up from the campsite (just after the chain). The crags are mostly clustered low down, but there are also routes way up the top. I've also included the crags at the top of the right fork of the stream (some of which the Kamoshika Hiking Course weaves through).
Hachiman Zawa
| Number |
Crag Name (Click to Get There) |
| 1 | Tada no Oo Iwa |
| 2 | Black and White Slab |
| 3 | Ringside Area |
| 4 | Ounen no Ran Slab |
| 5 | Haru no Modori Yuki Slab |
| 6 | Modoki Iwa |
| 7 | Amax Iwa |
| 8 | Tiny Slab |
| 9 | Mumei Ganpou |
| 10 | Trial and Error |
| 11 | Träumerai |
| 12 | Ootaki Migi Ganpeki |
| 13 | Hachiman Iwa |
| 14 | Gorilla Iwa |
Sagan Slab - Left Bank Slabs
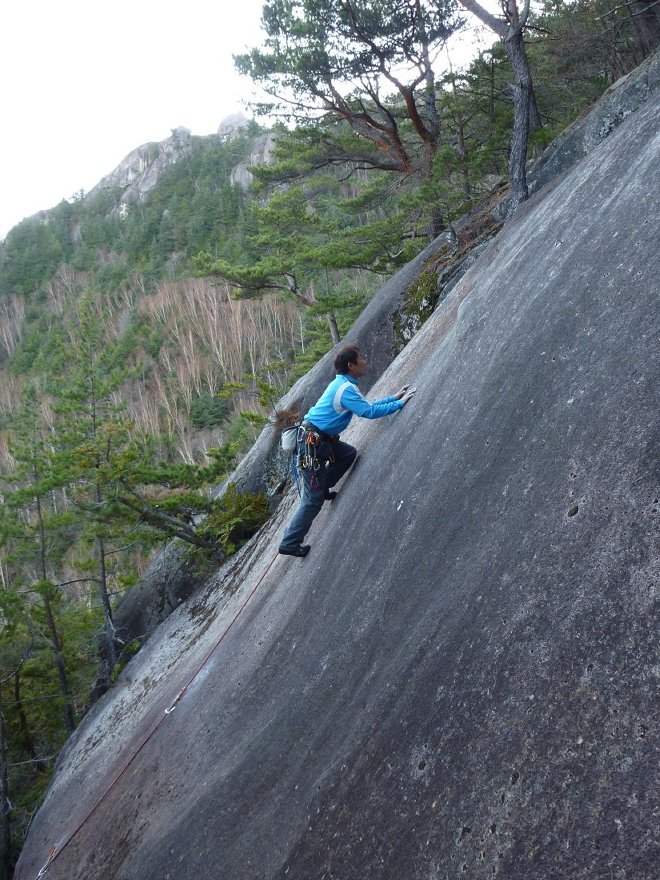
This is the area centred on the tapering slab on the right bank (going up) of Hachiman Zawa. There are many quality routes, almost all of which are slab routes on excellent rock.
Follow the Kimpu San highway to the chain. Just past the big stream coming down from the right (Hachiman Zawa), a path cuts off right and leads up and back into the stream. This path avoids Victor, an immensely popular boulder in the stream bed. Higher up, the path crosses the stream by Tada no Oo Iwa, skirts Sagan Slab itself, then cuts right up the hill side at a tiny subsidiary stream to the Haru no Modori Yuki area.
Tada no Oo Iwa - Justabig Rock
This is the big boulder in the stream bed below Sagan Slab. The build-up of stones behind the dam just below it has knocked a couple of metres off Romancing the Stone and WAKA, and may well be the reason why the former has been relieved of its bolts.
| Romancing the Stone | 5.11d* | 8m |
| A desperate start and easy finish. The bolts have long gone walkabout. | ||
| Start below the right face of the boulder. Step up, mantel desperately onto the slab, then breeze to the top. | ||
| WAKA | 5.11a** | 8m |
| The slanting, rampy line on the front face. Short, but nice moves. | ||
| Start near the right edge of the face. Pull up by an excellent technical sequence, then follow the obvious slanting line left to a lower-off. | ||
| Tada no Hang - Just a Hang | 5.11c** | 8m |
| The bolted line on the overhanging left face. | ||
| Start near the right edge of the face. Make a long reach to palm a good edge up and right. Lunge up and left from this to a good hold, then pull up and right onto the end of the ramp of WAKA. | ||
 |
Black and White Slab
This is the clean, tiered and tapering slab featuring a bottomless corner in its center. The routes are described from right to left.
The routes based on Pinch can be very confusing.
| German Suplex | 5.10c**** | 12m |
| Cracking slab-climbing, but too short for 5 stars. Take a Friend 1½ to protect the first clip. | ||
| Start at the right edge of the slab, at a very low-angled corner. Climb the corner (cam) and make a long reach to clip the first bolt, then drop down and make a neat pull right onto the slab. Move up and then left onto the faintest of ledges, step right and climb a blank white section slightly right (crux) to the easy-angled top slab. Be kind to the tree and use the lower-off of Alpinist or Black and White. | ||
| Alpinist | 5.12b** | 10m |
| The short but ridiculously hard slab between German Suplex and Black and White. | ||
| Climb the bolt line between German Suplex and Black and White. Crux at half height. | ||
| Black and White | 5.10c**** | 10m |
| Another Ogawayama classic. Great moves. Easier technically, but a more demanding lead than German Suplex, if you ask me. Before embarking, note the distance between the first and second clip. | ||
| Start up and left of German Suplex, below a slanting dike. Gain the dike by traversing from a flake on the left and pull up on good holds. Make a balancy step up onto the last of these good holds, clip, and relax! Now, the crux - smear up into the bottomless corner and follow this to the lip and a lower-off. Originally, the route sprinted off to the left from here to finish. Try it, it's fun. | ||
| YMO | 5.12a** | 15m |
| A direct line left of Black and White. YMO is short for Yellow Magic Orchestra, in case you were wondering. | ||
| Start about 1m left of Black and White. Climb steeply to a dike where face turns to slab. Mantel, then make desperate smears to gain the right end of a long shallow flake. Mantel again, then step right and layback a short flake or smear the slab to its right to a lower-off. The (one-time) third bolt has been removed, leaving a worrying step up to clip the bolt protecting the crux. | ||
| Big Mo | 5.11d* | 13m |
| A variation finish to Pinch. A Jerry Moffat route, no less. | ||
| Climb Pinch to the start of the traverse. Pull up, step left and finish direct. | ||
| Pinch Direct | 5.12a** | 12m |
| Another variation finish to Pinch. | ||
| Climb Pinch. Halfway along the traverse (from the third bolt), climb direct to the top. | ||
| Pinch | 5.10c*** | 17m |
| An excellent, varied pitch that should become more popular now that the iffy bolts have been replaced. | ||
| Start about 2m left of Black and White. Climb the steep wall direct on good holds to stand on an obvious white square-shaped hold. Clip, step left and mantel onto the base of the slab. Clip the lower of the two bolts and make a low traverse left to good holds. Climb boldly up the left edge of the easier-angled section of the top slab to a lower-off by a small tree. | ||
| Hiun no Ejison - Ill-fated Edison | 5.12a* | 15m |
| A very definite filler. | ||
| Start below the end of the traverse of Pinch. Climb up to join it, reverse the traverse, start Big Mo, then break out right to finish. | ||
| Chance | 5.11d** | 10m |
| A steep start and exasperating finish. | ||
| Start at the foot of the wall in the trees left of Pinch. Climb steeply up on good holds till they disappear. Smear and slap for a sloping ledge, then mantel to a lower-off. | ||
| Aserazu Ikouze - Take It Easy! | 5.11c | 10m |
| A ridiculous climb just right of the corner - without touching it! | ||
| Start, climb and finish about 50cm right of the corner. | ||
| Ame ga Yandara - When It Stops Raining | 5.11a* | 10m |
| Short, steep, and not very sweet. | ||
| Climb the centre of the steep ledgy wall just left of Aserazu Ikouze. | ||
| Tom no Hirune - Tom's Nap | 5.10a** | 12m |
| The pleasant wall and arete starting from the stream bed is absurdly popular. Also known as "Tom to Issho" and "Kante". | ||
| Climb the broken lower wall carefully to the jutting arete. After an awkward step up, climb the arete on its right side using some wonderful holds. | ||
| Ryuu and Tom | 5.10b* | 12m |
| A frighteningly loose variation finish to Tom no Hirune. | ||
| Follow Tom no Hirune, but at the arete pull round to the left to a tree in a recess. The block above you is hollow. Swing right and up on good holds to the lower-off of Tom no Hirune. | ||
The Upper Tier
| Basu Toire Tsuki - With Bath and Toilet | 5.10c** | 12m |
| A stiff little number up the right side of the wall that forms a second tier to the Black and White slab. Large Friend advised for the start. (This is marked in Japanese guides as a top-rope problem, but is now a reasonable lead.) | ||
| Start below a steep crack. Use this to pull up and gain a standing position on a dike. Thin moves off this and a roly-poly mantel lead to a good tree (no lower-off). | ||
| Scotch | 5.11a*** | 9m |
| A tidy little frightener with some very neat moves - not bad for such a short route. | ||
| Start below the white streaks and pockets left of Basu Toire Tsuki. Clip, pull up, step up, clip, pull up, pull up, gibber, reach, praise the Lord, mantel. Lower off, or climb the never-climbed top pitch up the crack at the back (a lovely 5.8 that deserves to be somewhere else). | ||
Ringside Area
This is the jumble of small slabs leading up and right from the Black and White Slab to the Kamoshika Hiking Course. Although rarely done, the routes up here are naturally clean and open and worth a look-see.
Follow a vague path up and right from the Black and White Slab for about 20m (hug the rocks as you go and you can't miss it). You can also drop down from the Kamoshika Hiking Course (look for the low-angled slab of Nani mo Iu Koto wa Nai).
| Sliding Kick | 5.10b** | 15m |
| A fun route with great moves, despite some poor rock. Take some medium/large runners for the overhang. | ||
| Start about 30m up and right of Black and White Slab, at a low-angled slab with a thin flake crack running up to a beak in an overhang. Climb the slab easily to the overhang, gear in the flake if required. Arrange gear at the beak and make a funky move onto it. Step neatly left and make a devious pull to a pleasant finishing slab. Ab off a tree. | ||
| Gong | 5.9** | 18m |
|
A very pleasant slab climb. Low in the grade. The trees forming the terrace at the base of the route have collapsed outward, creating a fissure between terrace and slab. It doesn't affect the route, but don't drop anything! | ||
| Start at a low-angled slab about 15m right of Sliding Kick. After a tricky start, climb the slab easily to ledge and tree. Pull up steeply onto the nicenicenice top slab and follow this to a tree. Ab off, or walk off to the right (facing in). | ||
| Speak Up | 5.8* | 12m |
| The leftmost line on the baby slab that pops out of the hillside just for a second, visible from the Kamoshika Hiking Course. Easy, but still pleasant holdless slabbing. | ||
| Climb easy slabs to a short steep section (possible Friend 3 in the deep pocket), then pull up onto the slab on good holds. Continue more holdlessly past 2 bolts to trees. | ||
| Unspeakable | 5.10a** | 10m |
| Nice slabbing up the centre of the slab. For this route and its neighbours, if you lower off or set up a top rope, set the rope high on the tree to avoid knocking loose stuff down onto yourself or your second. Note also that the block at the foot of the tree now tips if stood on - be careful! | ||
| Start behind a pine. The first bolt protects a mantel to get established on the slab. Continue direct past 2 more bolts to a diagonal dike that isn't all it promises to be, and then continue to a prominent tree. | ||
| Nani mo Iu Koto wa Nai - Nothing to Say | 5.10a** | 9m |
| More pleasant holdless slabbing, but way too short. | ||
| Start a couple of metres right of Unspeakable, and climb the bolted line (all of two bolts) to the tree. | ||
| Nani mo Hanasu Koto wa Nai - Nothing to Tell | 5.10a** | 9m |
| A trivial but enjoyable variation on Nani mo Iu Koto wa Nai. | ||
| Climb a non-line a metre right of the bolts of Nani mo Iu Koto wa Nai (reaching in to clip them). | ||
Haru no Modori Yuki Area
This is the jumble of slabs up and left of the Black and White slab.
Follow Hachiman Zawa just past Tom no Hirune, then follow a small path up and right, away from the main stream, till it is possible to cut into the hillside proper. A marked path leads to the base of the long slab of Haru no Modori Yuki. Another small path breaks out right before you reach Haru no Modori Yuki. This leads to the Ounen no Ran slab.
 |
Ounen no Ran Slab
Decent slab routes on good rock, usually climbed by people foiled by the crowds on Black and White, but well worth a visit in their own right. The routes are described from left to right - for the three routes on the left, scramble up into the arms of a big sexy cypress.
If you continue up the gully right of the slab for a few metres, you can pick up a short path leading right to the top of Unspeakable, etc.
| Bista no Natsu Yasumi - Bista's Summer Holiday | 5.9** | 25m |
| The lefthand line - low in the grade and very pleasant. 5 bolts. | ||
| Start by stepping left across the approach gully onto an undercut rib. Move out left again then climb more or less direct a couple of metres in from the edge of the slab. Finish slightly right at lower-off next to a tree. | ||
| Ounen no Ran - A Good Old-fashioned Mess | 5.10b** | 20m |
| Pleasant slab-climbing, but with a bit of bite. The mantel used to be a bit of a head crux, but the old bolt was replaced at a lower point than the original, making it possible to clip before manteling. Spoilsports. | ||
| Start in the approach gully. Climb a short corner (cams) then step out left to a flake. Make a long reach to palm a break, mantel, then make crux thin slab moves to a dike where the angle eases. Finish direct up the gently easing slab, past an isolated bolt. Ab/lower off as for Bista. | ||
| Hashire Merosu - Run, Melos! | 5.10a** | 20m |
| Similar to Ounen no Ran in character, though a fraction easier. The top crack can be sandy after rain. | ||
| Start as for Ounen no Ran, but after 3m or so step right onto good holds. From the top of these, smear scarily diagonally right and mantel a dike to the base of a crack. Climb this to a lower-off. You can get some rubbish cams low in the crack and a good cam just below the anchor. | ||
| Kanzen na Ran - A Complete Mess | 5.10b*** | 20m |
| The next line right has a desperate little traverse for those not versed in the Ogawayama smear. | ||
| Start 5m right of Ounen no Ran. Climb up to a small overhang (Friends). Pull over on good holds, move up slightly, clip a joke bolt (for some reason, this wasn't replaced when the other routes on this slab were re-equipped - anyway, semi-good small Friends 1m down), then make an improbable traverse left to join Hashire Merosu at the base of the crack. Finish up this. | ||
Haru no Modori Yuki Slab
A mixed bag of routes centred on the long, easy-angled slab of Haru no Modori Yuki.
Whenever you spend any time in the gully on the right of the main slab, be very careful not to knock any stones down.
| Haru no Modori Yuki - Spring Snow | 5.7*** | 90m |
| A long, easy slab route. Many variations are possible. Take a set of Friends for the here and there of it all - there aren't many bolts after the first pitch. | ||
|
Pitch 1. 5.6 (25m) Start at the toe of the slab. Pull up onto the slab proper from the right, then climb pleasantly right of its centre till level with a bolt belay in the gully on the right. Traverse right and belay (carefully, of course) in the gully. Pitch 2. 5.6 (23m) Move back onto the slab. Climb leftwards to a slanting groove and pull over (keep right of the small trees) at a bolt. Climb up and left across a fragile flake to belay at a lovely tree on a good ledge. Pitch 3. 5.6 (27m) Pull onto the slab behind the tree. Climb up and slightly left to a big ledge below a corner - a variety of lines exists, but a variety of protection does not. Just remember you're heading for the corner above a small pine. Belay on trees below and right of the corner - take your pick. Pitch 4. 5.7 (15m) Climb the neat corner to the top (crux of the route if you do it, good medium Friends) or dodge it on the left to finish over blocky bulges (5.5). | ||
| To descend, either ab the route, or scramble right to the Kamoshika Hiking Course and trundle down this. Cut in past Ringside Area to return to the Sagan Slab area, or continue down the Hiking Course back to the campsite. | ||
| Summer Rain | 5.8** | 90m |
| A new (2016) companion to Haru no Modori Yuki. Take a set of Friends, just in case. | ||
|
Pitch 1. 5.7 (28m) Start at the toe of the slab. Pull up and left onto the slab proper, then climb easily left of its centre to a bolt belay (with glued krabs) overlooking the gully on the left. Pitch 2. 5.7 (20m) Climb up to the slanting groove and pull out left (keep left of the small trees) at a bolt. Step left again and then climb up to the fragile flake of Haru no Modori Yuki. Continue to the belay ledge. Pitch 3. 5.8 (28m) Walk left to a slim bolted slab. One hard move up this gains easy but poorly protected slabs that lead to the trees below the headwall. Pitch 4. 5.7 (15m) As for Haru no Modori Yuki, climb the neat corner to the top. | ||
| To descend, either ab the route, or scramble right to the Kamoshika Hiking Course and trundle down this. Cut in past Ringside Area to return to the Sagan Slab area, or continue down the Hiking Course back to the campsite. | ||
| Oni no Kakuran - The Devil's Sunstroke | 5.10b | 20m |
| Almost always green and almost never climbed. An unpleasant start leads to an easy slab. Take a rack. | ||
| Start up and right of Haru no Modori Yuki and right of the gully at a flake crack overshadowed by trees. Climb the flake, thrutch the bulge, wrestle the tree and hug the slab. Finish at a ledge and lower off a tree (or climb Souzura Matsuri). | ||
| Kanrei Zensen - Cold Front | 5.11b* | 10m |
| A bouldery start and a stroll. | ||
| Start from the belay at the top of pitch one of Haru no Modori Yuki. Drop down and make hard moves into a groovy bit. Move up and right (take care with the flake - I've seen stronger ones made by Cadbury's) to a faint ledge and lower-off (or climb Souzura Matsuri). | ||
| Souzura Matsuri - Souzura Festival | 5.10b* | 15m |
| The slab and crack high and right on the crag. A good position, but not such a good route. Take Friends 1½ - 2½ for the crack. | ||
| Start from the belay at the top of Kanrei Zensen. Climb up and rightwards to a ledge and crack. Climb the crack to a lower-off at the top. | ||
| Koi wa Oatsuku - Love Should Be Hot | 5.10c** | 16m |
| Nice climbing with a couple of steep moves. The best route up here. | ||
| Climb the steep bolted line behind the belay to a slab. Continue to a lower-off. | ||
| Daruma-san ga Koronda - Piggy in the Middle | 5.10a* | 17m |
| A scratchy route for slab-tickers like me. | ||
| Start by scrambling very daintily about 15m up the gully from the belay at the top of pitch one of Haru no Modori Yuki. Belay at a tree in the gully (above the fallen one) and be careful not to kick anything down. Step onto the slab on the left and pad up in a curving line to a big thick tree and lower-off (no hardware). | ||
| Suzume no Namida - Chickenfeed | 5.10b* | 15m |
| Another scratchy slab route, but better than its partner. Literally, the route name is "The Tears of a Sparrow". | ||
| Start just up from Daruma-san ga Koronda. Pad direct then move up and left to finish up Daruma-san ga Koronda. The crux is getting stood above the second bolt. | ||
| Lolita Junko | 5.12a*** | 12m |
| This was the first route to be graded 12a at Ogawayama. Fingery moves up the face that thinks it's a slab 15m up and left of Haru no Modori Yuki. | ||
| Climb an easy, low-angled slab to the foot of the main slab. Pull up into its centre, then step right and weave a line up to a lower-off on a tree. | ||
| Ringetsu Izuru - Full-term Izuru | 5.13b** | 12m |
| A desperate variation finish to Lolita Junko. Rarely climbed. | ||
| Climb Lolita Junko till established on the main slab, then climb direct to the lower-off. | ||
| Yume no Hamsteak - The Hamsteak of my Dreams | 5.9** | 15m |
| The cleaned line up the stepped slab 10m up and left of Lolita Junko is worth persevering with. | ||
| Heave somewhat tediously up a dirty rib to the slab proper. Make a tricky mantel on the right edge then step left into the centre of the slab and mantel to a good flake. It is also possible to continue up the right edge, then step left to the flake. Either way, mantel to the top of the slab and then step left to a lower-off in trees. | ||
| Blue Island | 5.11a** | 10m |
| The short, isolated slab 30m up and left again is not much to look at, but it has some great moves. | ||
| Start at the left edge of the slab. Pull up, then move right into the centre of the slab on a very thin dike. Continue slightly left of centre to the top and ab off a tree. | ||
Modoki Iwa - Mock Rock
Modoki Iwa I is a tiny crag set high on the hillside above Sagan Slab. It has good routes on excellent rock. Its hidden partner further down, Modoki Iwa II, is rubbish.
Follow the Kaomoshika Hiking Course into the woods above the lower campsites. This starts out very pleasantly, but ends up as a bit of a zigzag slog. After about 20 minutes the crag is visible down and left of a big righthander in the path. Routes are described from right to left.
 |
| Various Positions | 5.11c*** | 15m |
| A tidy little gem up the wide, shallow crack and slab on the right of the crag. The top can be sandy after rain. Not a good route to top-rope. | ||
| Climb the shallow crack by thin moves. At its top make a slippery step right under the third bolt, then climb direct on neat pockets to a dike where the angle eases. Smear into the hillside and ab off a tree well back from the edge. Do not pull your rope down if there is anyone near the base of the route. | ||
| Nanpuu - South Wind | 5.10c** | 16m |
| A diagonal line centered on the slanting fault that never really becomes anything distinct left of Various Positions. 10a in Japanese guides. | ||
| Start just left of Various Positions. Climb up into a scoop. Smear up and left out of this, possibly using a faint dike on the right, to gain rounded flakes. Pull onto a ledge, admire the distance from the last bolt, then gibber on jugs to a bolt in the top slab. It is possible to protect this final clip with a sling or Friend 1ish behind a flake. Finish at a small but sturdy tree. If required, back this up with the bigger tree behind it. | ||
| Puu-san - Mr Pooh | 5.10a*** | 15m |
| Pleasant climbing up the centre of the slab. Take Friends 1ish and 4ish | ||
| Pull up to the crusty knob, fnarr, as for Nankaikisen, but where that route traverses off to the left, pull into a short crack (good gear). From the end of this, use a rounded flake to pull out left then go up to a junction with Nanpuu at the ledge. Finish up this. | ||
| Nankaikisen - South Circular | 5.10c* | 35m |
| A long climb for such a small crag. I couldn't work out the first pitch, so I've described it the way I did it. | ||
|
Pitch 1. 5.10c Start as for Puu-san, but after the first bolt traverse the dike left to Shioda Bridal Route. Pull up onto the dike as for this, then traverse left to a tree belay. A nasty pitch to follow. Pitch 2. 5.10b Pull up right of the belay tree and follow the all-too-short top slab to a tree at the top of the crag. Ab off. | ||
| Shioda Bridal Route | 5.10c** | 18m |
| A steeper, direct line up the left of the crag. | ||
| Start where the path drops down steeply to the lower crags. Pull over an undercut start to a crack (good wires). Reach up to a huge jug for the first bolt. Pull up using holds on the right, then make a tricky move up and left to better holds leading right to the ledge on Nanpuu. Finish up this. | ||
| Touch | 5.8 | 10m |
| A dirty kind of crackline way round to the left. I couldn't find it, but I didn't look very hard. It might be the one that leads up to the belay on Nankaikisen - I noticed some sawn-off stumps in that. If it is, don't bother. | ||
| Start way round left and up of Shioda Bridal Route. Climb direct along a series of cracks and flakes to a lower-off. Maybe. | ||
Lurking down the slope is the rather uninspiring Modoki Iwa II - extremely rarely visited and even less often climbed on.
| No Side | 5.10a | 18m |
| Somewhere under the moss is an almost attractive slab. | ||
| Start left of a flake and under a hang. Climb up to the hang then dodge it on the left and continue in a fairly direct line to a tree at the top. | ||
| Try | 5.8 | 20m |
| The short crack right of No Side. | ||
| Climb the crack till it ends. Move up, then traverse left into and finish up No Side. | ||
Amax Rocks
Not sure what the name's up to. This is a slim crag usually only seen from above (you can just see the top from the Kamoshika Hiking Course). I included the slab at the top as part of the same area, although it almost isn't.
Follow the Kamoshika Hiking Course to the second big righthander after Modoki Iwa. A sawn off and hollowed out tree trunk next to a lovely squat cedar is a good landmark. From here you get a good view of Balance of Kyakuryoku. If you step out on the promontory the other side of the cedar (be careful!), you can see the top bolt and lower-off of Cybernetics down to the left.
| Balance of Kyakuryoku - Fancy Footwork | 5.10c* | 16m |
| The bolted line on the slab visible from the hiking course. Well, when I say 'line'... | ||
| Pull up the steep lower wall (right of the bolt) and climb the slab boldly up and left to the third clip. Smear up to a jug and finish direct at a couple of small trees. | ||
Amax Rock itself is best gained by scrambling down the gully below Balance of Kyakuryoku or the gully the other side of the promontory. Either way, the ground is unstable and it's best to go down one at a time or in a tight group. At the bottom of the gully go up and left round a rib and scramble up a low-angled slab to where the rock steepens. The nervous might want to belay from the gully.
If you don't fancy the journey back up the gully, you can troll down the hillside to the collapsing stream of Hachiman Zawa. There are occasional pink and red ribbons on the trees to mark the way, but basically head down and left and mind your step when you drop out of the forest and into the stream bed.
| Amax Route | 5.11b* | 13m |
| The short, bolted line on the pleasant dark face left of the cut-away. Harder than it looks, but still worth a look. | ||
| Pull up onto the face and climb up and right to a nasty second clip. Harder moves left and up lead to a couple of bolts with grotty tat and no krab. | ||
| Cybernetics | 5.10c** | 30m |
| The righthand line manages to find a bit more rock. Take a rack. | ||
|
Pitch 1. 5.10b Start as for Amax Route. Climb the crumbly corner then the right edge of the face in a slanting line past intermittent cracks to a bolt belay. Pitch 2. 5.10c Continue in the same vein to a tree at the top. | ||
The Hachiman Iwa Area
These are the rocks at the top of Hachiman Zawa, consisting of the huge but broken face of Hachiman Iwa itself and the line of smaller crags to the right that leads across to Mumei Ganpou.
To get there, slog all the way up the stream bed, ignoring the Black and White rocks etc., to a prominent fork. Take the left branch for Hachiman Iwa and Gorilla Iwa. Take the right branch for Ootaki Migi Ganpeki - in both cases, the stream bed ends just below the rock and it takes about 1 hour from the campsite. From Ootaki Migi Ganpeki, it is possible to bushwhack right to the Kamoshika Hiking Course.
Warning: Particularly higher up, but also lower down, the stream bed is unstable and prone to rockslides.
Hachiman Iwa - Hachiman Rock
| Usunoroman | 5.10d** | 100m |
| A good long route that gets you away from it all. Take a full rack, with one big cam (Camalot #4-ish) and expect to make a day of it. Note that most of the bolts are well past their sell-by. | ||
|
Pitch 1. 5.10b Start at the base of a slab resting against the main crag. Climb awkwardly to a nasty move to reach a break on the right. Pull up then make a bold layback to gain a terrace. You can scramble to this terrace from the left (facing in). Pitch 2. 5.10d Fall across the gap behind the belay to gain and follow a line of discontinuous flakes that steepens to a crux pull onto a slab. Climb this direct to a terrace and tree belay. Walk up and left 10m to a small clearing on the terrace and belay at the base of a crack. Pitch 3. 5.10a Climb up to a subsidiary corner, but don't climb it. Swing low round right on brown rocks, then mantel and move left then back right to the main corner ("Itou Corner"). Jam up this to belay on trees on an exposed ledge. Pitch 4. 5.10b Stride low and left under a bolt to a good foothold, then climb direct to a crack slanting left ("Akatsuka Crack") and jam this to the left end of a dike. Mantel out right onto this and traverse right to its end. Make a bold high step to a bolt then go up to a bolt belay (new bolts!) at the right end of another dike ("Dike in the Sky"). Pitch 5. 5.7 Welcome to the only pitch that isn't hard for the grade! Traverse the dike easily left to its end, then continue across crumbly slabs and belay on a good tree (2nd ab point) below an ochre cave. Pitch 6. 5.10a Climb up and right to a steep rib with an obvious high crunchy jug. A hard high step onto this gains a scoop. Follow easy cracks out of this to a final swing out left to the summit. The hanger bolts through the right edge of the crunchy roof are the 5.10b top pitch of Kuuten, which starts 50m to the left of Pitch 3. | ||
|
To descend: Ab 20m from the summit spike to the stance at the top of Pitch 5; Ab 40m to the terrace level with the stance at the top of Pitch 2 - it is possible to walk off to the left (facing in) from here, to join a path skirting the crag; Ab 40m to the path at the base of the main crag level with the stance at the top of Pitch 1; Walk down to the base of the route (or ab down Pitch 1 if you're not sure). | ||
Gorilla Iwa - Gorilla Rock
This is the name given to the two bumpy crags up and right of Hachiman Iwa. Hardly ever visited.
From the base of Hachiman Iwa, skirt the crag to the right and pass under a huge boulder resting against the main crag (Katsuobushi Iwa).
| Tomahawk | 5.10d** | 35m |
| A good but rarely climbed crack that just keeps getting easier. Take a rack. | ||
|
Pitch 1. 5.10d Start at the base of the obvious left-slanting flake/crack. Follow this till it ends at a belay below a small hang. Pitch 2. 5.10b Step down and right, then go up to the right edge of an overlap. Pull right into a crack and follow this to another overlap. Pull over and traverse left to belay at the base of a chimney. Pitch 3. ----- Climb the chimney to the top. Scramble off, then trundle back down the gully to the base. | ||
| First Dream | 5.11c** | 30m |
| A steep, impressive line, but too far to walk for Joe Normalclimber. | ||
| Start further up the gully from Tomahawk below an impressive overlapped face. Climb right to a tricky mantel, then left to the right edge of an overlap. Pull over (crux), then climb direct past two more overlaps to the top. | ||
Ootaki Migi Ganpeki - Big Waterfall, Right Face
The right fork in the stream below Hachiman Iwa leads up and under Ootaki ('The Big Waterfall'). The waterfall itself is normally no more than a trickle. There are two aid lines on rickety bolts to the left of the fall. The right face of this gives the routes described here, most of which are impressive cracklines. All the routes require a full rack of gear. Apart from Tomokazu Route and the first pitch of Sayonara Momoe-chan Route, the routes are never climbed. The bolts are all old (ring bolts or RCC bolts) and, along with any tat on them, to be treated with suspicion if not contempt.
From the approach to Hachiman Iwa, take the big right fork in the stream. This becomes a faint path that passes under the crag (and leads eventually to the Kamoshika Hiking Course, possibly via Mumei Ganpou).
| Shame on You! | 5.10b* | 40m |
| The corner right of the fall. Good climbing and a very good line, but heavily dependent on poor bolts. (This may have been rebolted at the end of 2011, but I haven't been up to check since.) | ||
|
Pitch 1. 5.10b Start left of a shallow corner about 15m right of the fall. Climb the corner, then loop left and back right to a bolt belay at the foot of the continuation corner. Pitch 2. 5.10b Climb the continuation corner, crux midway, to an anchor. Ab off. | ||
| Broadway | 5.11b* | 20m |
| Good steep handjamming. Two poor bolts protect the section between the cracks. | ||
| Start at a crack a few metres right of Shame on You! Jam neatly to a gargoyle at the end of the crack, then make technical moves to gain a second crack on the left. Jam this to a belay at its end. Ab/lower off. | ||
| Tomokazu Route | 5.8** | 15m |
| The thumping flake crack right again. | ||
| Climb the crack formed by the left side of the block to a belay on its top. Ab/lower off. | ||
| Sayonara Momoe-chan Route - Goodbye Momoe | 5.9** | 65m |
| A good route (for 2 pitches) that requires a variety of crack techniques and a headtorch. | ||
|
Pitch 1. 5.9 Start at the crack right of Tomokazu Route. Climb the crack formed by the right side of the block to a belay on its top. Judging by the condition of the top pitches, most people call it a day here. Pitch 2. 5.8 Climb the slab left of the continuation corner crack for a few metres past a peg to a crap bolt, then traverse back into the corner (now a chimney) and squirm through to emerge below a dirty corner on the far side. According to the original description, climb the corner past ancient threads to a tree belay on a good ledge. However, all the likely trees looked dead to me, so it's better (and far more logical) to belay on the comfortable terrace after you squirm out of the chimney. Pitch 3. 5.7 According to the original description, move out left to a crack, climb this and layback the big flake above to the top. I couldn't find this - it may have been obscured by bush. If you do climb to the top, ab the route, or ab off via the top of Kazehana Route. Note that if you belay immediately after the squeeze, you can walk off - drop down to the left (facing out) into trees, walk down to a slight col, then scramble down a short corner to the hillside and circle round to the right to the start of the route. | ||
| Kazehana Route | 5.9* | 30m |
| The crack forking right from pitch 1 of Sayonara Momoe-chan Route involves more speleologistics. I've never climbed up the inside of a cheesegrater, but this is what it must be like. | ||
| Climb the crack through various incarnations to a corner capped by a roof. Thrutch up into the bottomless chimney and scrape to a poor tree belay (good backups available). I don't recommend abbing off this tree, but if you do, remember it's 30m to the ground. Alternatively, you can ab off a better tree away from the top of the route (there are many) or you can walk off as described for the top of pitch 2 of Sayonara Momoe-chan Route. | ||
Mumei Ganpou - Nameless Ridge
This area includes the rocks in the line up and right from Ootaki to the Kamoshika Hiking Course and others that the Course actually winds through.
The crags can be gained by heading up and right from Ootaki, but I'd only recommend this if you're already climbing in that area (and have some idea of what's where). It's far less tiring and distressing to follow the Kamoshika Hiking Course up past Modoki Iwa. For the lower section, cut off the path on the first bend after Tiny slab (i.e., before you climb the first ladder) and drop down a steep gully - the rocks are on the right and a promontory on the left gives you a good vantage point from which you can decide not to bother before too much damage is done.
Mumei Ganpou Lower Section
The unclimbed impressive steep slab left of Dai Nippon Kokumin Route is a good landmark, and the hawk-eyed should be able to spot the tat on the tree at the top of Athletics Club.
| Shoujikimura no Yasai Cake - Honest John's Vegetable Cake | 5.10b* | 30m |
| A chossy beginning, but some neat moves up top. Take a rack. | ||
| Start about 25m up and right of Athletics Club at a vague groove below overlaps. Climb the groove, then go up and left to a hand crack. Follow this to the first overlap. Pull over and follow the continuation crack (crux) to the next overlap, then climb direct. | ||
| Athletics Club | 5.12a* | 40m |
| Orginally a top-rope problem up a line of discontinuous cracks right of the big dirty corner. Take a rack (but don't expect to use much of it!) | ||
| Start by pulling up a fixed rope below a curving crack right of a rib. Climb up to the crack and follow it round the rib till it ends. Climb up to a V-crack and follow the right branch till it ends. Traverse in to the left branch and follow this to easy ground. | ||
| Love is Easy | 5.11c** | 20m |
| A steep, impressive line, but another one that is too far for Joe Normalclimber. | ||
| Start on the big ledge at the top of pitch 1 of Dai Nippon Kokumin Route. Climb the impressive fingercrack till it ends at a flake. Follow this up and left to a tree belay. | ||
| Dai Nippon Kokumin Route - The Great Japanese Citizen's Route | 5.10a** | 60m |
|
A rambling crack climb with annoyingly short pitches. Start by a huge fallen tree (still huge and fallen in 2016). Warning: 2016, there is a big, very loose block at the top of Pitch 1. | ||
|
Pitch 1. 5.7 Climb up to a wide crack and follow this to a tree belay. Pitch 2. 5.10a Climb the continuation hand crack till it ends, then go up to a tree belay. Pitch 3. ------ Drop down to the left and follow a diagonal line leftward to belay on a ledge below a hand crack. Pitch 4. 5.10a Climb the crack to the top. | ||
| To descend, it is possible to ab off, but better to scramble off right and walk across to the hiking course. | ||
Mumei Ganpou Upper Section
The next few climbs start on or near the main hiking course.
| Tiny Slab | 5.10c** | 18m |
| The obvious small, black, diamond-shaped slab starting from the path. Totally twee. Take bigs and smalls. | ||
| Start at a crack on the left. Climb diagonally right into the centre of the slab (crux) then direct to a weakness in the overlap above (good small wires). Pull through and climb to a corner at the back. Follow this up then diagonally left to a good tree (no lower-off). | ||
| Kaze Makase - Blowing in the Wind | 5.10d* | 17m |
| The left edge of the slab and the steep arete above. The grassy lower crack takes Friends. | ||
| Start at the crack on the left. Climb this to the overlap. Pull into a recess, then go left round the arete, up and back right onto the easy top slab. Finish at the same tree as Tiny Slab. | ||
| Trial and Error | 5.10d** | 18m |
| A good line with good moves. Deserves to be rebolted and more popular. Take Friends 2 - 4 and a Rock 1. | ||
| Start just left of the crack. Climb across to the bolt at its base, then pull into it and follow it till it ends at a crap ring bolt (bomber Rock 1 just below). Make a scary pull up right then go diagonally left (crux) and up to a lower-off. The name is very well chosen - you never seem to get the moves right first time. | ||
| Rabirinsu Kante - Labyrinth Arete | 5.8 | 25m |
| Follow the path up and left from Trial and Error to the next sizable buttress (about 60m along the path). The first route is based on the vegetated rib right of the main face. Take a rack and some extra slings. | ||
|
Pitch 1. 5.8 Start left of the rib. Climb across to its right, then pick the easiest line to a ledge and belay Pitch 2. 5.7 Zig left and zag right to another ledge. Pitch 3. -- Easy climbing to the top. To descend, scramble across to the left and drop down onto the hiking course or ab the route. | ||
| Humouresque | 5.11b* | 23m |
| The right arete of the main face. | ||
| Pull over a bulge and into a niche just right of the centre of the face. Traverse right to the arete and climb it till it leads you left to a lower-off below the top. Old tat and no krab. | ||
| Träumerai - Reverie | 5.11a** | 22m |
| The central line proves quite enjoyable. | ||
| Pull over the bulge as for Humouresque. From the niche, climb direct to the lower-off. | ||