
This is what I decided to call the group of rocks centred on Godzilla Iwa, which line the north slope of the next prominent stream south of Karasawa. Part of this appeared in old topos under the name 'Perseus Za Ryuusei Gun' (Perseid Meteor Shower) (and Godzilla Iwa was a different rock on the opposite side of the stream).
For the interested, there is a huge face (referred to as Godzilla no Ie - Godzilla's Lair - in the old topos) on the south side of the south slope of this stream. From a distance this is a gobsmacker, but not so hot from closer up. Still, there are lines to be had and signs of development. There are also many fresh rockfall scars!
|
|
Kinseijin - The Venusian
This is a two-tiered slab found by your correspondent on the slopes below and right of Godzilla. And though I say so myself, it is an excellent venue for a day's slabbing.
Follow the Kimpu-san highway for not quite three kilometres to a small shrine on the right (about 500m after Phoenix Rock). Leave the highway and follow the stream bed just right of the shrine for 30m till blocked by a rock step. If this is dry, scramble up the first couple of metres of rock and then just keep heading up the stream. If the rock step is too wet, take a detour through grassy woods just right of the stream (cairns) to return to it about 50m higher up (if in doubt, head back left to the stream). Continue to a prominent cube of a boulder in the stream, then cross it and zig-zag up to a big slab on the left. Prends ton Temps & Co. start where the slab tapers almost to a point by a huge fallen cypress. It should take about 45 minutes from the campsite.
Here's a bonus access map.
 |
The Lower Tier
The first route described starts 15m up and right of Prends Ton Temps, but is gained by a 25m detour right then diagonally back left along a sloping wooded terrace.
| Crystal Trips | 5.10a** | 18m |
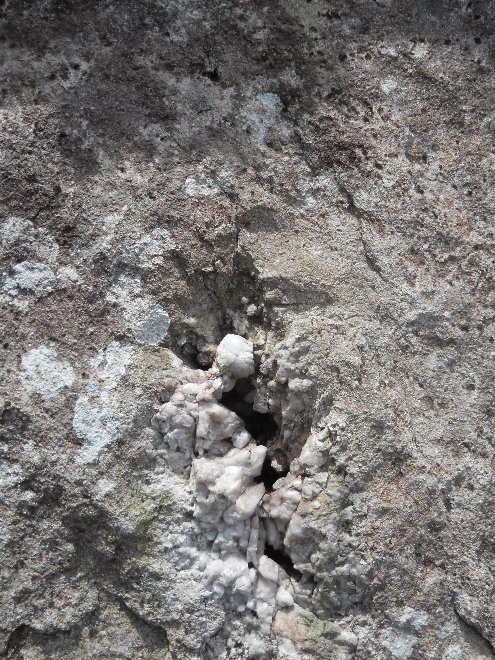
| A pleasant slab pitch taking the left edge of the subsidiary right slab. Worth doing just for the crystal crack on the bottom slab. Take a set of Friends (#0~#3). | ||
| Start near the left edge of the slab, under the line of a black and brown corner leading through an overhang. Pad up to a huge jug (Friends) then go directly up (past an eye-catching short quartz crack) to a shelf on the right. Pull left round the overlap to a cluster of pockets (Friends - these need to be the twin-axle type because they will completely open once inside the pockets). Step left and climb boldly but easily to a lower-off below the bulging headwall. | ||
| Rockfist | 5.10c*** | 25m |
| A neat slab pitch, but it can be mossy just below the first overlap. Take a Friend #4 | ||
| Start 5m right of the fallen tree below a faint, rounded ledge. Mantel onto the ledge and climb to a double overlap past some deep pockets (bomber Friend #4). Pull over the first overlap, smear carefully to the second and mantel precariously rightwards over this on a micro-dike. Continue directly up the slab, past a break, to finish at a lower-off without tat (the bolts are designed to be threaded). | ||
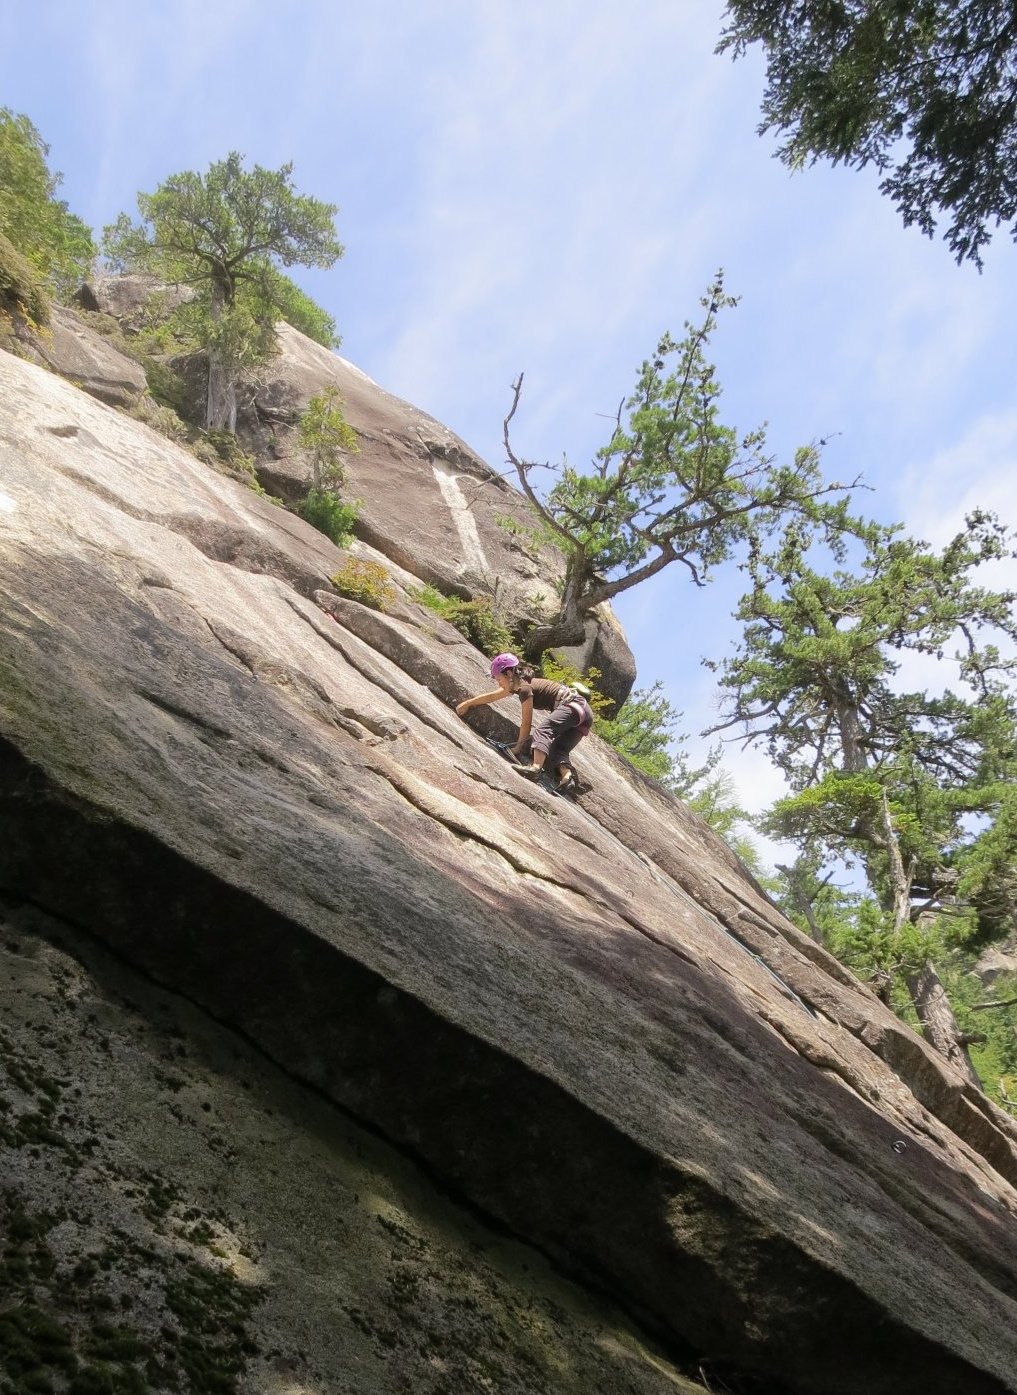
| Prends ton Temps - Take your Time | 5.10a**** | 27m |
| An excellent varied pitch, easy at the grade. The big flake takes good Friends 0-3. | ||
| Start at the roots of the big fallen tree, by a small flake. Climb up and right into the centre of the slab, then go direct to a big overlap. Pull over to a big flake on the left and layback this till it ends at another overlap. Step left and pull over using a marvellous crystal in a pocket, then climb direct on good, spaced holds to a lower-off. A 50m rope will be just enough to get you down (but I recommend 60). | ||
| Miyuki, Ouchi, Denwa! - Miyuki, Phone Home! | 5.10b*** | 28m |
| Another cracking slab pitch, this time with lots of bolts. The first overlap takes good Friends 2-3. The name refers to the wife of former PM Hatoyama, who claims to have been taken to Venus by UFO. | ||
| Start on the big fallen tree, just left of Prends Ton Temps. Follow a hairline crack past a couple of bolts to an overlap (good Friends). Pull over and continue to a second overlap. Make an excellent technical sequence over this to gain a standing position at the foot of the final ochre slab. Climb straight up to where a corner arches in from the left, then step right to the lower-off of Prends Ton Temps. A 50m rope will be just enough to get you down (but I recommend 60). | ||
| Kinsei Kakuchou - Venus Extension | 5.10b*** | 49m |
| A big pitch, requiring stamina, route-finding nous and devious protection skills (double-rope recommended to reduce drag and get you down in a single ab). Take a full rack and double up on the small cams. I might put this up to 10c. In fact, if you're not reading this, I already have. | ||
| Start on the big fallen tree, at a short, shallow, right-facing corner. Climb the corner (excellent micro-cam and wire at its end) and its continuation shallow crackline to a scoop. Move up and, at the third bolt, make a tricky move diagonally left to a flake (small cam), then step left again to a corner (small cam and wire). Make a delicate pull round the arete onto a slab and step up to a scoop (good gear). Mantel up and right to a second scoop (good cam) and make a tricky move left out of this to gain good breaks leading left below the pine needle terrace. Throw a sling on the tree and follow a ramp left to below the final crux slab. Two bolts point the way to a lower-off on a big old pine. Ab off. Note that it is 26m straight down from the anchor of Akatsuki. | ||
| Akatsuki - Daybreak | 5.10b*** | 30m |
| The name also refers to a series of Japanese probes to Venus. Another good, varied slab pitch, which also requires a bit of thought as to route-finding and protection. The top slab is superb. Take a set of wires (Rocks #3~#7) and Friends #0~#3. | ||
| Start on the big fallen tree, a step up and left of Venus Extension. Climb the slab to the overlap (good cams where the crack widens) till it is possible to step right over the overlap at a shallow pocket. Place excellent gear in the flake and continue easily to a bolt. Trend left to a short wide crack leading onto another slab (excellent cam slot on the left). Move up and right to a scoop (where Venus Extension pulls in from the right), place gear, then trend left to a big pocket. Mantel this (crux) then step delicately up to good holds and a wide break. You can get a lovely Rock 7 in the small but deep pocket on the lip of the break. Mantel and traverse left to a lower-off. Ab off (26m straight down!) | ||
| Venus Pump | 5.11b** | 22m |
| Best approached by climbing Rockfist or Crystal Trips. You can protect the first clip with an excellent Friend #½ or #1. | ||
| Start at the top of Rockfist or Crystal Trips and climb to the head wall. Move up and left under this (Friend), then make a thin pull out right and then up to a white jug below a big dike (crux). Reach up and mantel onto the dike, then follow the bolts, thinly at first, up the relenting slab to a lower-off in a cluster of trees at the top. It's 40m straight down to the start of Crystal Trips, or you can get down in 2 abs, or you can walk off to the right (facing in). | ||
The Upper Tier
For the Upper Tier, follow the base of the slab right and up to a cave formed by stacked boulders. Go up left past the cave, then right over its top, then work back diagonally left above the slab to a huge cedar right of an easy-angled slab. Ab off this to a 2-bolt belay on the pine needle terrace. This is just under 25m, so make sure you put a knot at the end of your rope! (Or go off a lower tree.) You can also ab in from the top of Kinsei Kakuchou.
| Otoshiboshi - Fallen Star | 5.10a** | 15m |
| A neat slab pitch on perfect rock. 5 bolts, but 3 have been damaged by a rockfall - check them out when you ab in. | ||
| From near the right edge of the pine needle terrace, step onto the big dike and follow the bolts as they curve up and left to a lower-off. | ||
| Ogawayama Chainsaw Daigyakusatsu - Ogawayama Chainsaw Massacre | 5.10b** | 15m |
| Not quite so good as its neighbour, but an interesting crux. 3 bolts. | ||
| From the centre of the ledge of pine needles, step onto the big dike at a big hole. Smear up and left to gain an improving flake (crux), mantel onto the jug this becomes, then slab carefully to the lower-off. | ||
Lurking in the woods about 70m right of the cave (cross the stream and head up the hillside slightly) is a dirty, neglected slab with a single line of bolts. This is halfway to the ridge of Perseus Za Ryuusei Gun.
| Saint Alfonso | 5.10a | 17m |
| Possibly enjoyable when clean, but currently filthy. | ||
| Pull onto a green pancake and smear up lichen past 2 bolts to a break. Pull up to a cleaner slab and climb this past 2 more bolts till the angle eases and the vegetation returns. Meander up to a solid tree over the top (no tat). The things I do for this guide... | ||
And lurking in the woods about 30m up the slope from Saint Alfonso is a clean but crumbly crag of brown rock with a single line of bolts on its front (east) face, which is lighter in aspect and more open due to a recent rockfall.
| Domino Theory | 5.10a* | 17m |
| Just about worthwhile due to the top moves. | ||
| Climb the broken arete on the left to a neat small corner formed by a worryingly detached pinnacle. Mantel onto the top of this then make a couple of steep moves up the face behind it to the top. Belay on a decent tree over the back. | ||
About 40m up the slope from Domino Theory is a bigger rock consisting of a low-angled vegetated slab on the right, with a slightly steeper slab on the left capped by a small dome split by an obvious wide crack.
| Bumcheek Crack | 5.10c* | 22m |
| The best of the three in this line of rocks, but rather mangled by the bolts alongside the crack. | ||
| Climb the bolted line up broken slabs to a good ledge and possible belay. Thrutch the obvious crack to the top. | ||
Inseki - The Meteor
The granite blob on top of the ridge between Phoenix and Godzilla has been omitted from the last few Japanese guides. It is much easier to find if you know where Godzilla and Kaseijin are. There are four good crack routes and a couple of bizarre, recently bolted lines. On all the routes, the rock is a bit crunchy for the first couple of metres and the gear is excellent.
Follow the Highway to Phoenix Rock. There is, according to the old topo, a 30m slab called Warming Up Slab just past Phoenix Rock on the right, and a path leading way up the gully from here to Inseki, passing a couple of other crags on the way. I couldn't find this, so: About 50m past Phoenix Rock on the right, an old wide forestry track breaks off up the slope. Follow this. It bends left then levels off and ends at a cairn after about 150m. From just before its end, zig-zag up the slope at an overall right angle to the track to a small outcrop. From the top of this, intermittent red tape leads you up the slope to a gully with a slab on the right (Escalator, 3P, 5.8 goes up there somewhere). Keep the rock on your right (this opens up into the huge face of Perseid Meteor Shower) and keep slogging up till the rock runs out and the path levels slightly. From here, the tape starts again and leads quickly to the rock under the cracks of Melting Jam and Cleaning Windows.
 |
| Melting Jam | 5.10c*** | 20m |
| A great line that gives a good technical crack pitch. Take a rack up to Friend 2.5. | ||
| Start on the east face where the path meets the rock below the obvious hand crack. Climb up to the narrowing crack, then climb it by steep moves till it gets too thin even for fingers. Crux moves gain a good lock then a jug, after which the angle eases. Lovely jamming leads to a short headwall and a couple of bold moves out left and up land you on a good ledge with a three-bolt belay. Ab off, or climb the flake in the arete behind the belay (10a) if you want to top out. There are also two shiny bolts in the filthy slab round to the right (not to mention the bizarre waste of bolts round the arete to the right of the route itself). | ||
| Cleaning Windows | 5.9** | 20m |
| A good thrutch, if there is such a thing, up the wide crack just left of Melting Jam. Take a rack of anything Friend 3.5 or bigger. 5.8 if you know what you're doing. | ||
| Climb the crack by a series up and down udges to a small ledge and tree. Climb a short corner to the anchor at the top of Melting Jam. Have a rest. | ||
| Outer Crack | 5.10a** | 22m |
| Another varied crack pitch. Take a rack with a couple of bigs. | ||
| Start at few metres left of Cleaning Windows where the terrace drops away. Climb a wide crack into a recess. Continue behind the tree to pull out into a good hand crack. Up this and over ledges to a tree at the top. Ab off. | ||
| Mini-books | 5.9** | 25m |
| And another varied crack pitch requiring a rack with a couple of bigs. The bottom is easier than it looks. | ||
| Start down and left of Outer Crack. Follow a wide slanting crack up and left to pull into a nearly chimney. Udge up this to sinking jams. Continue over ledges to the top. Ab off. | ||
Suisei Iwa - The Comet
Another impressive crag that is rarely seen or visited. Nagareboshi Meguri passes through for its 5th and 6th pitches. Pitch 5 is worth doing in its own right, although it's starting to get a bit dirty. The other routes are much newer. Seen from the south, it looks like this.
As for Kinseijin, follow the Kimpu-san highway for not quite three kilometres to a small shrine on the right (about 500m after Phoenix Rock). Leave the highway and follow the stream bed just right of the shrine for 20m till blocked by a rock step. If this is dry, scramble up the first couple of metres of rock and then just keep heading up the stream. If the rock step is too wet, take a detour through grassy woods just right of the stream to return to it about 50m higher up (if in doubt, head back left to the stream). Continue to a prominent cube of a boulder in the stream, then cross it and zig-zag up to a big slab on the left. This is Kinseijin. Skirt the base of this slab left to a path marked with red tape hacked through rhododendrons. Follow this for about 70m (you might have to climb over or under some big fallen trees) to the first huge crag, currently marked by a big treefall away from the rock at its righthand end. The first 2 routes start from the base of the fallen trees. You can also approach by cutting right from the path to Godzilla Iwa - there is some red tape marking this, but it's not obvious.
Here's a bonus access map.
 |
| Shake, Rattle and Roll | 5.10a** | 80m |
| A fun expedition that covers some impressive ground and has a well-positioned crux. Some of the rock is crumbly, but protection is excellent. Take a rack and a lot of slings. | ||
|
Pitch 1. 5.6 10m From the base of the fallen trees, climb the white slab to a tree and ring bolt. A doddle after the first move. Pitch 2. 5.8 25m Step left and climb a short crack to a crumbly open groove. Climb this till stopped by a headwall, then pull left across the slab and swing left and up to a narrow ledge. Traverse this left to belay on trees and gear by a large block. Pitch 3. 5.10a 15m Step onto the block and pull up into a slanting corner using the amazing detached flake on the left. Use a thin slanting crack to pull up to the top of the corner (crux) and then make an awkward pull right (gritty, but excellent jams and gear) to gain a spacious ledge. Belay on the tree and cams at its right end (facing in). Pitch 4. 5.8 30m Climb the easy short groove left of the brown rib behind the belay to another ledge. Climb the steep slab above past a brown flake to join Nagareboshi Meguri at the first summit, drop down over the back and scramble easily to the true summit. Block belays. Scramble down over the back and follow a path into the hillside then back down the gully between Suisei Iwa and Godzilla Iwa. | ||
| Tricycle Dike | 5.10c*** | 80m |
| Another fun expedition, with a lovely jaunt across the big dike in the middle of the crag. Again, some of the rock is crumbly, but protection is excellent. Take some medium to large cams for the top pitch. | ||
|
Pitch 1. 5.6 10m As for Shake, Rattle and Roll, climb the easy white slab to a tree and ring bolt. Pitch 2. 5.10b 28m A great pitch, but you'll need to extend runners to avoid rope drag. Step left and up, then head out left across the slab under an overlap. Where this ends, pull onto the huge flake then swing left into the tree-filled chimney it forms. Pull across onto the clean slab, mantel onto the big fat dike and follow this almost to its end. Make a move up the slab then go diagonally left to the left end of the ledge on which Shake, Rattle and Roll belays. Belay on a good tree in the corner left of the ledge. Pitch 3. 5.10c 18m Climb the corner to the overhang then undercling left. Where the crack curves up make a hard high step onto a foothold on the left to gain the easier finishing groove. Continue to a spacious but crumbly ledge and scramble right to belay on a good small tree and bomber Friend #4. Pitch 4. 5.8 24m Climb the crumbly brown face using a crack just right of the prominent block to join Shake, Rattle and Roll at the first summit, then drop down over the back and scramble easily to the true summit. Block belays. Scramble down over the back and follow a path into the hillside then back down the gully between Suisei Iwa and Godzilla Iwa. | ||
| Paul | 5.10a** | 17m |
| The easier of the 2 lines, with an unusual start. Take Friends #0~3. | ||
| Start below a prominent block below the overlap. Clamber over a tree growing helpfully horizontally away to the right, arrange gear, then pull onto the block. Lean left and oblige an inviting cam slot, then pull left onto the slab. Climb direct past 3 bolts till forced left by a shrubbery, mantel a thin dike, then continue easily to a lower-off. | ||
| Skinny Minnie | 5.10c*** | 16m |
| A good sustained slab pitch. | ||
| Start in the centre of the short slab below the overlap. Smear and mantel to the overlap and pull over using a small flake. Continue direct by good, sustained moves on perfect rock to the lower-off of Paul. | ||
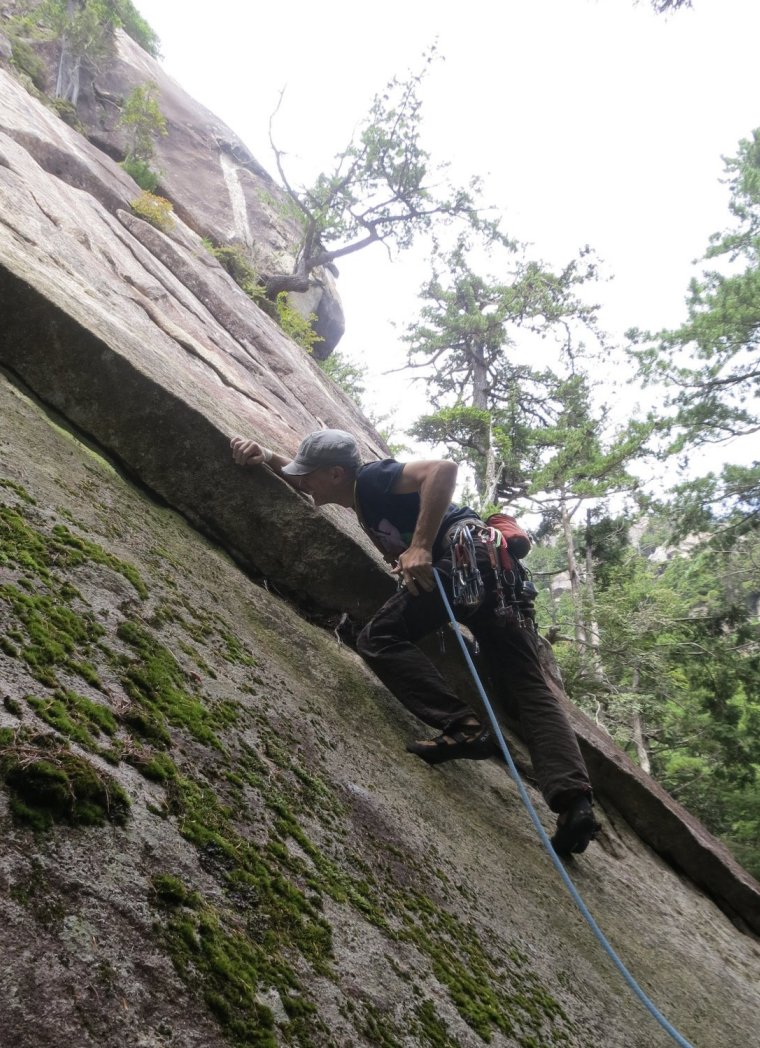
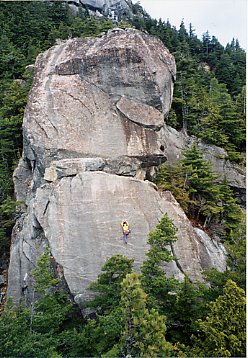
Godzilla Iwa - Godzilla Rock
A cluster of prominent buttresses high on the right side of the valley that heads up to Kimpu-san.
Follow the highway to Kimpu-san for about three kilometres. So you go past Phoenix Rock, past a clearing and turning point in the highway, past the shrine where you turn off for Kinseijin. At a big (but usually dry) stream coming down from the right, about 100m past the shrine, turn right and follow a becairned path up the stream for 100m. The path then cuts up and right into as yet unspoilt pine forest, so be good. The path in the forest is marked with red tape (OK, so it's a bit spoilt). Godzilla Rock is the first two rock towers you see from the stream (the third is Kaseijin).
A single route starts from the level of the highway and finishes way up there.
| Nagareboshi Meguri - Star Trail | 5.10c* | 190m |
| A long and meandering route that involves quite a bit of walking. Still, good for a bit of sightseeing. Start at the slab just right of the highway and left of a tumbledown wall apparently held up by a magnificent pine. | ||
|
Pitch 1. 5.9 Climb the centre of the dirty, overlapping slab - easier and more pleasant than it looks. Pull into the woods at the top using a flake embedded in a dead tree. Belay on a tree of choice. Walk up and left 5m to a terrace below a crumbly face. Pitch 2. 5.10b Start on the right of the bulging lower face. Move up and pull out left into the centre of the face. Climb the slim slab above to a lovely picnic spot in the forest. Follow a path up and right for 30m to a slab. Pitch 3. 5.8 Climb the centre of the dirty but pleasant slab to a ledge. Pull through bulges on the right to another slab and climb this to the top. Walk up and left about 25m to a tiny face with a good crack and two bolts. Pitch 4. 5.8 Climb the tiny face. Rope hardly necessary. Rejoin the path and trudge up and left for 30m to the base of a much bigger rock - Suisei Iwa (The Comet). Follow the base of this left to a bolt line up a cleaned slab left of a corner. Pitch 5. 5.10c Climb the slab to a tree at an overlap. Pull over onto the cleaner top slab and follow the bolts up this with an odd kink left just below the top. Belay on a good tree on a good ledge. It is possible to walk off from here into the descent gully, almost dead level with the start of Pitch 7. Pitch 6. 5.7 Climb steeply past a couple of bolts to easy ground. Follow a fault right behind a tree then climb an easy, crumbling face by any line to the first summit (possible belay). Drop down and climb the low-angled summit cone. From here you can walk off into the hillside. Head left to the gully and follow this down to the base of a bolted vegetated slab on the right as you head down - you end up almost level with the end of Pitch 5, but on the next rock across the gully to the south. Pitch 7. 5.8 Climb the centre of the green-but-pleasant slab past trees and overlaps to a huge tree on a big ledge. This puts you at the extreme right edge of Godzilla Lower Tier. Pitch 8. 5.9 Climb the bolted slab to its right shoulder, then pull right to a steep bolted face. Heave pleasantly up this on big holds to twin bolts on a low-angled slab. This puts you at the right edge of Godzilla Upper Tier. Pitch 9. 5.8 Climb easy, broken slabs leftwards to a big ledge. | ||
| Descend by either following the path that the route intermittently uses (drop down and right from the top of the route, then follow a path down the gully keeping the rocks of the route first on your right, then on your left) or by dropping down and left to the col in front of Kaseijin (fixed rope in place in 2014) and following the path down from there. | ||
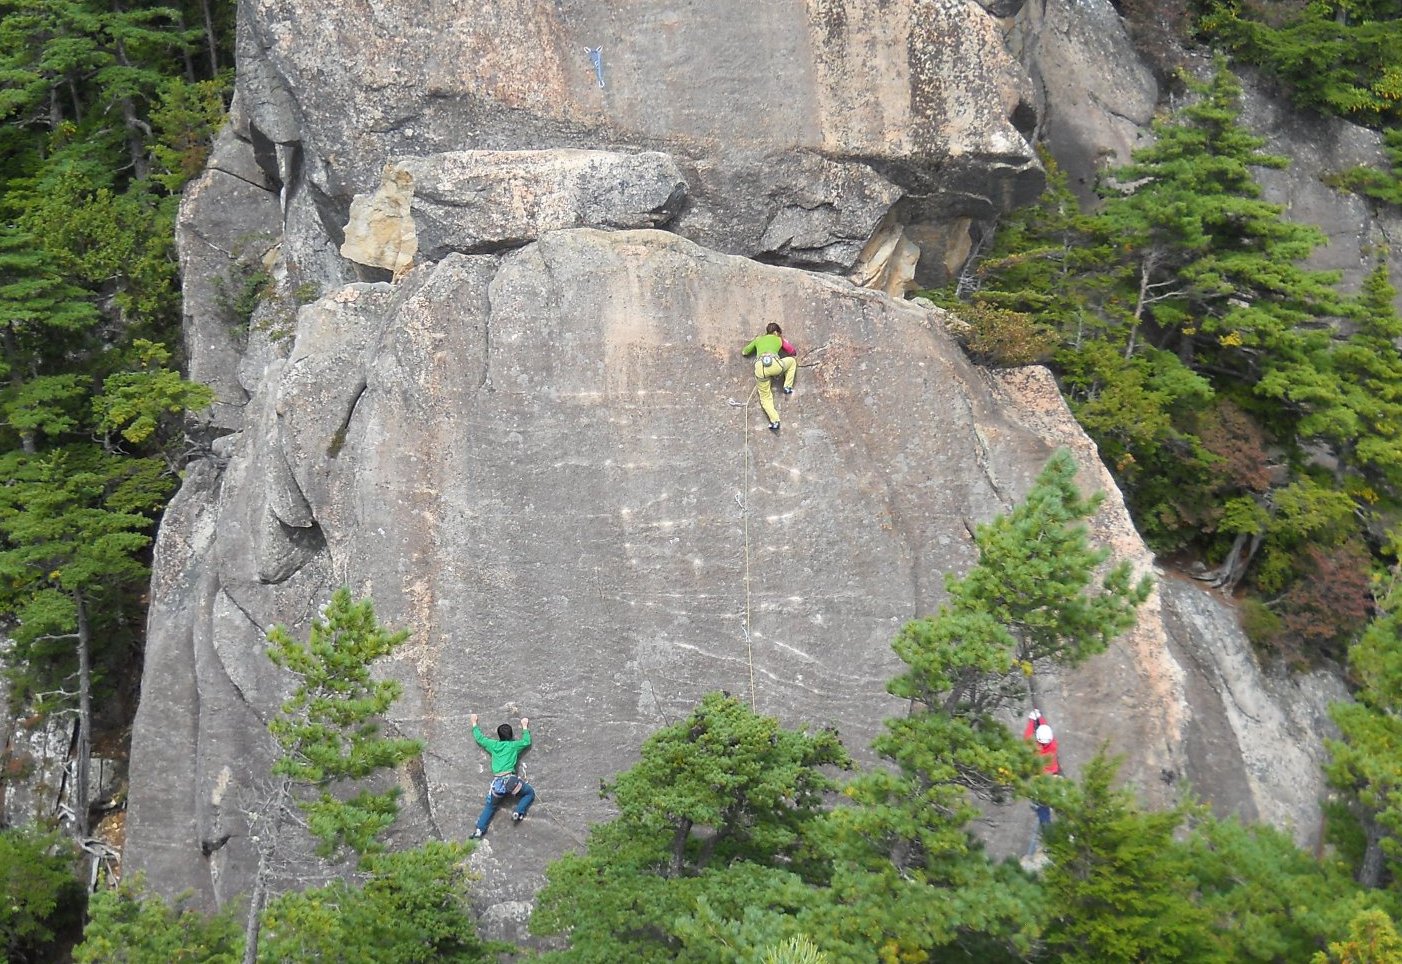
Godzilla, Ogawayama-style - looks like this:
 |
Godzilla Lower Tier
The impressive just-overhanging wall and the jumbled walls to its right.
| Midori no Kire Me - Green Gap | 5.10a | 35m |
| Partially dropped from the last two guides, and hardly surprising, really. I haven't done the first or last pitch. If you do it, try playing 'Spot the Clean Hold'. | ||
|
Pitch 1. - 5.9? Where the terrace leads out from the hillside, pull up onto the dirty slabby rib on the left of the steep wall and follow it to the terrace below the Upper Tier. Pitch 2. - 5.7 Climb the crack and the face around it to land in a trench. Pitch 3. - 5.9? Climb the dirty crack and slab left of Ansaraa to a lower-off. | ||
| Akko Kante 2 - Akko Arete 2 | 5.12a** | 14m |
| The easiest route on the steep face skirted on the way to the upper crag. | ||
| Start in the centre of the face, below the right edge of a ramp. Gain the ramp and gorilla left almost to the arete. Pull up and climb the arete in a good position to a lower-off. | ||
| Sunkissed | 5.13b*** | 15m |
| Steep and fingery climbing up the wall right of Akko Kante 2. | ||
| Climb the ramp, as for Akko Kante 2, but halfway along, pull onto the ramp and climb direct to a flake. Kink right then left to get over this, then finish direct. Lower off. | ||
| Ouga - Yellow River | 5.13a**** | 15m |
| Marginally easier but more satisfying climbing to the right of Sunkissed. It sounds like I've done these routes, doesn't it! | ||
| Start the ramp as for Akko Kante 2, but pull up onto the ramp immediately and climb direct by technical moves on baby sharpies for three bolts. Move left to the flake and finish as for Sunkissed. | ||
| Chabinba | 5.13a** | 13m |
| Strenuous climbing up the centre of the wall. | ||
| Start behind the big tree on the terrace (the Japanese guide recommends pre-clipping the first bolt from the tree - but you wouldn't do that, would you?). Climb direct (crux) to the second bolt, then step right and climb direct till level with a flake. The original route moves left to the flake, then up to finish. A variation goes up then left. | ||
| Mushoku no Natsu Yasumi - Summer on the Dole | 5.12b*** | 13m |
| Steep, strenuous climbing on generally good holds. Said to be reminiscent of Yellow Crash. | ||
| Start a couple of metres right of Chabinba and climb almost directly to the top. Also said to be a soft touch for primates. Pass the peanuts, Mr. Shifter. | ||
The following three routes are reached by following the fixed rope right from the right edge of the terrace. This rope is not to be trusted. If you have any doubts about the traverse, rope up!
| Senshuuraku | 5.12c** | 12m |
| A direct line up the steep wall immediately after the end of the fixed rope. Senshuuraku is the name of the last day of a 15-day sumo tournament. | ||
| Follow the bolts. Sustained. | ||
| Shinkocchou - True Colours | 5.12a*** | 12m |
| Powerful moves up the intimidating wall at the right end of the fixed rope. | ||
| Pull over the initial bulge, then climb direct on halfway decent holds till things get dirty. Fortunately the holds get better. Finish direct. | ||
| Cossack Dance | 5.11c | 12m |
| A nice idea, but a dreadful route. Overbolted, dirty and loose. | ||
| Scramble over easy ground to the foot of a dank cleft. Climb this by a combination of bridging, back-and-footing and giving-up-and-pulling-on-bolts till it is possible to climb the right wall to a ledge and lower-off. | ||
Godzilla Upper Tier
The slabby top tower. The first route climbs the narrow buttress up on the left on the way to the upper crag
| Himeshara | 5.12b** | 13m |
| A good steep face route. Himeshara is a kind of tree which boringly translates as Tall Stewartia. They have gorgeous golden bark which is, allegedly, too slick for monkeys to climb, so the tree has another name in Japanese which translates as Monkey Slide. | ||
| Climb the face, move left onto the arete and back right onto the face to a lower-off. | ||
The next route starts from the far (right) end of the terrace.
| Nosutarujii - Nostalgia | 5.9* | 13m |
| The wide crack at the far end of the terrace (and just left of the top pitch of Nagareboshi Meguri). Not as pleasant as it looks. Take a rack. | ||
| Climb the crack to its end and finish slightly left at a lower-off. | ||
The next three routes start from the trench in which Midori no Kire Me finishes.
| Hotondo Byouki Crack - The Nearly Mad Crack | 5.10a* | 13m |
| The lefthand dirty wide crack. I think the righthand crack is the continuation of Midori no Kire Me. | ||
| Climb the dirty wide dogleg crack and bolted slab above to a lower-off. Not very nice. | ||
| Ansaraa | 5.11b** | 12m |
| Neat enough climbing up the left side of the arete. | ||
| Climb the slab easily till it steepens, then a couple of technical moves and a sharp pull lead to a lower-off. | ||
| Godzilla no Maachi - The March of Godzilla | 5.11b* | 13m |
| Steep enough climbing up the right side of the arete. | ||
| Pull over the lower bulge, then climb steeply up and pull round to the left for the finishing moves of Ansaraa. Unsatisfying. | ||
The next two routes start from a bay round the opposite side of the tower. You need to scramble up a bit, so be careful.
| Ajia no Hoshi - Star of Asia | 5.12a*** | 23m |
| A good varied route. | ||
| Start in the shallow, left-curving corner. Climb this then traverse left to a ledge on the arete. Make a fierce pull back right onto the slab to gain a crack. Follow this till it ends, then climb up and right on slopers to a lower-off. | ||
| Shuuryouten de Aimashou - See You at the Belay | 5.11b*** | 18m |
| Another good varied route. | ||
| Pull over the bulge on the right on good flakes, then climb up and left to a wide crack in the centre of the slab. Climb this to a lower-off. | ||
Kaseijin - The Martian
A handful of cracking slab routes and a lot of lichen.
Approach as for Godzilla Rock, but continue up the path till it leads up a broad gully on the right. Follow this to its top. Daimos Slab is gorgeously obvious on the left. The mound it faces is the back of Godzilla Upper Tier. You can approach Hotondo Byouki Crack, Ansaraa and Godzilla no Maachi from here.
 |
| Chibi Maruko no Baasan - Little Maruko's Granny | 5.8 | 30m |
| A poor route up the left side wall. Not as steep as it looks. | ||
|
Pitch 1. 5.8 Pick the easiest line up the lower wall (follow the bolts, even) to a terrace and bolt belay (up and right). Pitch 2. 5.8 Walk back down and left then step up into a big recess. Swing up and left on a wonder jam (Friends) then follow the easiest line to the top. Ab off down Daimos Slab, or make a long walk off to the right (facing out). | ||
| Hangyounin no Single Catch - The Fishman's Single Catch | 5.10d* | 30m |
| An excellent first pitch, worthwhile in its own right, and a poor second with one very hard move. | ||
|
Pitch 1. 5.8 Climb trickily over mossy slabs up and right to the foot of the slabby corner. Follow this to a terrace and bolt belay (up and right). If you're the nervous type, like me, take a couple of big Friends for the corner. Pitch 2. 5.10d Walk down and left then step up into a big recess. Use the right edge of this to make a scary clip (you can protect the clip with wires), then pull up and over with difficulty. A move up brings easier ground. Follow a rightwards-slanting line to the top. Ab off down Daimos Slab, or walk off to the right (facing out). | ||
| Ookami Otoko to Juujika - The Werewolf and the Crucifix | 5.10a** | 30m |
| A very good, sustained route. | ||
|
Pitch 1. 5.10a Climb the corner/slab to the roof, then traverse left and make a funny move round into a short corner. Up this to a terrace and bolt belay. Pitch 2. 5.10a Climb up to the belay bolts, then swing round the arete to the foot of a crack. Entertaining moves up this, with or without a mobile chockstone, are fun enough, but try to get on the right face as soon as possible for a lovely finish. Ab off down Daimos Slab, or walk off to the right (facing out). | ||
| Marvin | 5.10b*** | 26m |
| Pleasant slab climbing with a little spice - in contrast to its neighbours. | ||
| Step off the sharp flake, clip the first bolt of Daimos, then traverse left to the arete. Climb the slab just right of the arete to the terrace - sling on a knob and/or Friends. Make a high step onto the top slab to gain a flake, clip a bolt you no longer need, then climb more easily to the top. | ||
| Daimos | 5.11c**** | 12m |
| Good climbing up the centre of the lovely slab. | ||
| Step off the sharp flake and climb straight up the centre of the slab to a stopper move where the shallow crack gives out. You might want to make a step left to get off the dike at the top. | ||
| Phobos | 5.10b*** | 12m |
| Pleasant, over-bolted climbing up the right of the lovely slab. A very soft touch for the 10d it gets in Japanese guides. | ||
| Step off the sharp flake and climb the line of bolts right of the centre of the slab to the terrace. | ||
| Uchuu Yuuei - Swimming in Space | 5.8* | 25m |
| A good first pitch, for which a set of Friends is required. | ||
|
Pitch 1. 5.8 Step off the right of the sharp flake and layback the shallow corner to stand on a jug at its end. Next make a scary smear to the big ledge. Bolt belay as for Daimos. Pitch 2. 5.7 Climb the slab behind the belay to the overhang, then traverse left and pull up onto an easy angled finishing slab. Ab off down Daimos Slab, or walk off to the right (facing out). | ||
| Nurikabe - Wet Wall | 5.8* | 15m |
| A neat little thrutch up the wide crack right of Uchuu Yuuei. | ||
| Step off the right of the sharp flake as for Uchuu Yuuei, then move right into a recess and climb the wide crack in the slab to the big ledge. Traverse left to the lower-off of Daimos. Ab or lower off this, or finish up Uchuu Yuuei. | ||
| Kyoufu no Uchuujin - The Scary Alien | 5.10a* | 15m |
| A good line, but a bit too dirty for your liking. | ||
| Start behind the cave. Move up into the slabby corner and follow this to a terrace. Choose a tree and ab or lower off. Be careful not to knock any rocks down on yourself or second. | ||
| Senkou Hanabi Nakane Hotaka Special - Hotaka Nakane Sparkler Special | 5.10a | 25m |
| Hotaka Nakane would be a famous alpinist. Perhaps he has a thing about sparklers. Anyway, the first pitch is OK. The second might be missing its bolts. Which might not be a bad thing. | ||
|
Pitch 1. 5.8 Step off the right of the sharp flake and climb the grassy corner/slab to a garden and tree belay. Pitch 2. 5.10a Climb the slab behind the belay, keeping to the left of the bolts (if they're in). Pick a tree and ab or lower off. | ||
| Nezumi Hanabi - Fire Cracker | 5.10b | 25m |
| Poor climbing up a scruffy slab. | ||
|
Pitch 1. 5.10b Start at the right end of the vegetated ledge at twin bolts. Make tricky moves up and right to get established on the slab then climb more easily up and vaguely left to a garden and tree belay. Pitch 2. 5.8 Climb the slab behind the belay, keeping to the right of the bolts (if they're in). Pick a tree and ab or lower off. | ||
| Babylon no Yousei - The Fairy of Babylon | 5.10d*** | 18m |
| A committing start followed by intricate face/slab climbing and a dirty finish. | ||
| Start at the right edge of the big ledge at the top of Pitch 1 of Yoko Muki Roketto Hanabi. Step up onto the cutaway and move right to a scoop. Move up to a flake and use this to make technical moves to where the angle eases. Finish with care up a mossy slab. Ab or lower off the monster tree. | ||
| Yoko Muki Roketto Hanabi - Horizontal Rocket | 5.7 | 85m |
| That's Rocket as in the firework. A long and tedious route, only half of which involves actual climbing. | ||
|
Pitch 1. 5.7 Start slightly up the gully at the right end of the long low wall. Climb up to the toe of the slab and follow its right edge. Where it steepens, move left and pull onto the hanging garden. Choose a tree and belay. Pitch 2. -- Wander left and wonder why. Tree belay as for Nezumi Hanabi. Pitch 3. -- Keep going left to the bolt belay of Daimos. Pitch 4. 5.7 As for Uchuu Yuuei, climb the slab behind the belay to the overhang, then traverse left and pull up onto an easy-angled finishing slab. Ab off down Daimos Slab, or walk off to the right (facing out). | ||
| Uchiage Hanabi - Roman Candle | 5.10a* | 25m |
| A good varied pitch, but currently very dirty. | ||
| Start up and right of Pitch 1 of Yoko Muki Rocket Hanabi. Step up and climb a groove through the overhang. Continue in an almost direct line to a bulge. Pass this on its right then climb a crack and groove to the top. Pick a tree and ab or lower off. | ||
Tracy Island
The next decent sized crag up from Kaseijin. From the top of Kaseijin, it is clearly visible 300m further up the hillside and slightly left of the line to the big crag on the valleytop. Either make a beeline for the crag from the top of Kaseijin, or, from the approach to Kaseijin, dodge left round a low broken wall then go up the hill to a short steep wall with an impressive arete. Dodge this on its left then go straight up to the next crag. This is Tracy Island. The only route to date starts up and right, where a gully is formed by a short cracked wall on the right, and a wooded ledge cuts in to the crag on the left. Nip in here, no offence, and you'll see an obvious flake running up the slab to a short, steep wall.
| Thunderbird 1 | 5.10c** | 20m |
| A good varied pitch. Take a set of Friends and a couple of wires around Rock 4. | ||
| Climb the flake and make a long reach right for a jug at the top of the wall. Use this to gain a good jam at the base of the bottomless crack on the left. Pull over and follow the flake to the next steepening. Use a handy little pocket to reach a good hold in a short crack (Rock 4ish wire) and pull right onto the slab. Up the left edge of the slab past a bolt to a break, then up the brushed top slab to a tree and lower-off. | ||
Meiouseijin - The Plutonian
A well-positioned fortress-like rock situated up and left of Godzilla no Ie. You are unlikely to see this from the south, but if you do, it looks like this.
Follow the Kimpu-san highway to the stream for Godzilla/Kaseijin (about 200m after the shrine). Leave the highway and follow the marked path up the stream for a few metres. Where the path for Godzilla/Kaseijin breaks out into the woods on the right, continue up the stream (cairns) for about 100m till a red and white taped path cuts up left. Follow this path steeply at first through dense forest till it veers left and up without climbing too steeply to the huge face of Godzilla no Ie. From near its left end, break out left following red and yellow tape to a col behind the rock just visible through trees to the left (Meiouseijin). The routes are best approached by dropping down the other side of the col and are described from left to right.
 |
| Plutonic Love | 5.10b** | 21m |
| Gains the airy slab left of the crack via a steep groove. Friend #2 and Rock #3 recommended. | ||
| Start below a groove on the left of the platform. Balance up in to the groove then layback (Friend #2 and/or Rock #3) to flakes on the left. Smear out right past a flake to join the main slab at a break. Climb this on spaced bolts to the top. | ||
| Persephone Please | 5.10c*** | 20m |
| A great line, but unfortunately the start is much harder than the rest of the route. Take a full set of cams up to Friend #4 (with a couple of microcams for the start). | ||
| Start on the right edge of the platform, below a short corner. Step carefully onto the tree and use a good finger rail (microcams) to make a long steep pull for a downward-pointing spike. Use this to make a high step into the corner. From its top, swing out left onto the slab and follow the obvious crack pleasantly to the top. The upper crack is flared in places, so take care with cam placements. | ||
| Rishin Kidou - Eccentric Orbit | 5.11d*** | 25m |
| The big capped corner provides another great line, this time with a ridiculously sustained sequence of moves. Take some small cams and wires to protect the moves before the first bolt and after the last bolt. | ||
| Start from the base of the tree that Persephone Please steps off, gained by a short, easy downclimb. Step right onto the slab and climb easily to the base of the corner (gear). Climb the corner by fierce fingertip laybacking to the roof, only to realise the hard part is still to come. Swing left with desperate moves between the only 2 decent holds, followed by an exasperating pull out left to a break on the slab. Pad up and step right round an overlap, then mantel to and climb a thin crack to the top. | ||
Voyager 1
A miniature Meiouseijin, situated a further 100m up the ridge and clearly visible from the top of Meiouseijin.
From the col behind Meiouseijin, head straight up the ridge to the first substantial rock. There is no path and the hillside is densely wooded in parts (as is the base of the route). The left (south) face of the rock is a very crumbly slab that fades into the hillside, but the right end is (fortunately) much more solid. Only one route to date.
| Heliopause | 5.10b* | 17m |
| Climbs a series of corners on the southeast face to finish up a short open slab. Take a rack. | ||
| Start at a shallow corner on the right edge of the southeast face. Balance up this to pull left onto the slab at a break (good cam). Move up and left to a bigger corner line and climb this past an overlap. Pull left under the second overlap onto the final slab and finish up a thin crack. Block and tree belays. | ||